8 tips to create amazing photographs of the sky
All too often, the sky is used merely as a backdrop for a regular landscape composition or is cropped out of the shot altogether. Yet if you look up, some of the most dramatic shapes, colours, and lighting take place right above us in the sky. Clouds, stars, sunsets, storms, and the northern lights are all examples of intriguing photographic subjects taking place in the sky. The following tips can help you do them justice.
1. Choose a time of day with the right lighting
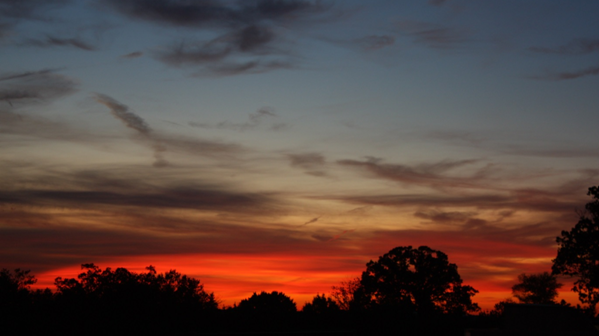
Sunrise and sunset are typically two of the best times to take photographs of the sky, due to the intense colours and interesting shapes. The deepest colours are usually about 15 minutes before sunrise or after sunset. However, the night sky can also be an intriguing subject, allowing you to photograph the aurora borealis, moon, stars, and meteor showers.
2. Choose a setting in advance
Take a critical look at your setting before you start snapping away, so that you can find the ideal setting for your shot. You want a panoramic view of the sky, for a more dramatic end product. If you’re photographing the night sky, you’ll also want to be clear of manmade lighting that could interfere with your shot.
3. Reduce shutter speed to capture clouds
There can be a great deal of glare when you’re photographing the sky in the daytime, so try reducing your shutter speed to get a crisper look. This can define the outlines of clouds and darken the rest of your image slightly.
4. Avoid obstructions in your sky-scape
Watch out for trees, buildings, or other objects in your way when you’re trying to take a full sky-scape shot. You want to have a clear, clean view of the sky, without a cluttered composition.
5. Capture changes in weather
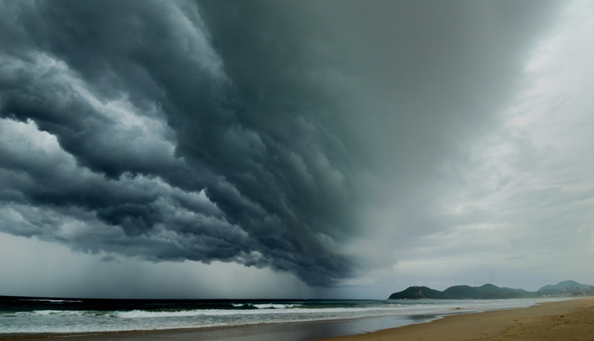
Some of the most exciting photographs depict extreme weather, such as a city skyline with dark clouds approaching or the moment that the first rays of sun break through dark clouds. An approaching thunderstorm often is shown with billowing shapes and changing textures, making it a fascinating subject for photographers.
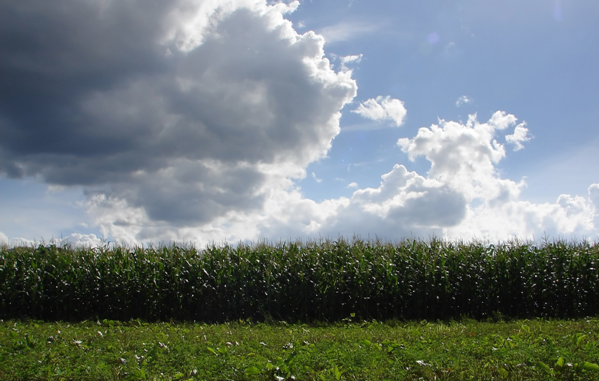
6. Use clouds to create emotion in photograph
Along the same lines as the tip above, you can also use clouds to create emotion or drama in your photographs. Think of the difference between bright, fluffy white clouds and dark storm clouds, for example.
7. Choose the right equipment

A simple digital camera is all you need to photograph the sky, provided that it allows you to change the focus and shutter speed. However, you can improve your shots with additional features such as a tripod and different types of lenses. Tripods are particularly useful for photographing the night sky, in order to get clear shots of the stars above, while a wide angle lens can help you capture a sweeping sky scene. It’s helpful to take a digital photography course to learn how to best use this equipment.
8. Experiment with filters
Another piece of equipment which is helpful for those interested in photographing the sky is a polarizing filter. This reduces glare, and can help prevent your pictures from looking washed out and overexposed. The filter won’t work when the sun is directly in front of you, so you’ll want to keep the sun to your right or left.
By keeping these tips in mind, you’ll be able to create some stunning landscape photos with the entire sky as your subject.


Reducing (slowing) shutter speed won’t reduce glare or increase detail/contrast/definition. Allowing the shutter to remain open longer increases the amount of light reaching the sensor, effectively washing out the detail/contrast/definition desired in a well exposed sky shot.
Increasing shutter speed, on the other hand, will yield the desired results by reducing the amount of light/glare getting to the camera’s sensor thus increasing the amount of contrast detail/definition being recorded.